How to Make Roller Coasters in Minecraft: A Coaster Nerd's Guide to Layout, Speed Control, and Actually Fun Ride Design
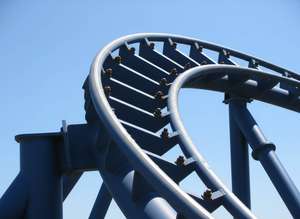
If you've ever watched a real coaster POV and thought "I kinda want to build that," Minecraft is one of the best sandboxes for it. Not because minecarts are a perfect simulation (they're not), but because Minecraft forces you to think like a designer. You're balancing speed, pacing, sightlines, and "will this thing stall and embarrass me in front of my friends." That's coaster design in a nutshell.
And honestly, Minecraft coasters are a gateway drug into real-world coaster thinking. You start with "rails on a hill." Then you're suddenly talking about lift hills, block sections, trim brakes, terrain interaction, and why the back seat feels different than the front. The game makes you learn by building, failing, and tweaking, which is basically how coaster design evolves in real life too.
Before You Build: Pick Your Coaster Type (Because It Changes Everything)
In Minecraft, "roller coaster" can mean a few different things, and choosing the type early saves you a ton of rebuild pain later.
Classic Minecart Rail Coaster (Vanilla)
This is the standard: rails, powered rails, redstone, and gravity doing most of the work. It's the easiest to understand and the most "theme park" feeling if you build good scenery around it.
Redstone Launch Coaster (Still Vanilla, Just More Spicy)
You can fake launches using powered rails, timed boosters, and station logic. It won't feel like an LSM launch, but you can create that "0 to fast" moment if you design the track and boosts right.
Modded Coasters (If You're Using Them)
If you're on Java with mods (or a server with plugins), you can get smoother track pieces, banking, inversions, and more realistic physics. But this guide is written to work in vanilla first, because that's where most people start.
Materials You Actually Need (And the Stuff People Forget)
You can build a coaster with almost nothing, but if you want it to run reliably and not feel like a shopping cart on gravel, here's the practical list.
Core Track - Power
Rails, powered rails, redstone torches (or redstone blocks/levers), and minecarts. Powered rails are your lift motor and your "keep the train moving" tool. Redstone torches are the cheap, simple way to power them.
Station - Control (Optional, But Makes It Feel Real)
Buttons, levers, detector rails, powered rails at the station, and maybe a few redstone repeaters if you want timing. If you want to get fancy: pistons, slime blocks, and observers can create dispatch systems, but you don't need that to start.
Safety-ish Stuff (Minecraft Style)
Blocks for guardrails, fences, glass panes, and lighting. Not because minecarts need OSHA, but because players do. Also, lighting keeps mobs from turning your station into a horror attraction.
Step 1: Start With a Layout, Not a Track (The Real Coaster Designer Move)
The biggest beginner mistake is laying rails first and hoping the ride "becomes good." Real coasters don't work that way. Start with a layout path, then convert it into track.
Use "Marker Blocks" to Sketch the Ride
Pick a cheap block (wool, concrete, whatever) and place a single line where the track will go. Think of it like drawing your coaster in 3D. Mark your station, lift hill, first drop, big turns, and where you want the ride to return.
Think in Ride Moments
Even in Minecraft, a coaster is better when it has distinct moments: the slow climb, the view, the drop, the fast low-to-the-ground section, the "oh wow" turn near scenery, then a calmer return to station.
Step 2: Build a Station That Doesn't Suck
Your station is the first impression. It's also where your coaster either feels like a real attraction or like a random rail line behind your house.
Simple Station Blueprint
Make a straight platform. Put powered rails at the dispatch area so the cart doesn't crawl out like it's tired. Add a button or lever to power the first boost section if you want manual dispatch.
Station Length Matters
If your station is too short, you'll constantly bump into walls and have no room for decoration. Give yourself space for queue vibes, signage, and a clean exit path.
Step 3: The Lift Hill: Your Coaster's Engine Room
In vanilla Minecraft, lift hills are mostly powered rails doing the work. The trick is spacing and consistency.
Powered Rail Spacing (Practical Rule)
If you want a reliable lift hill, don't get stingy. A common approach is powered rails every 2 to 4 regular rails, powered continuously. If you notice stalling, tighten the spacing. If it's rocketing up like a launch, you can space them out more.
Make the Lift Hill Feel Like a Lift Hill
Add catwalks, chain lift housing, support beams, and a little station audio vibe if you're into it. Even simple fences and trapdoors can sell the illusion.
Step 4: The First Drop: Make It Count Without Breaking Physics
The first drop is the emotional core of most coasters. In Minecraft, it's also your biggest speed generator.
Steeper Isn't Always Better
A super steep drop can be fun, but it can also make the rest of the ride uncontrollably fast, especially if you don't have trims or speed management. A good first drop sets your pace, then you shape that speed into moments.
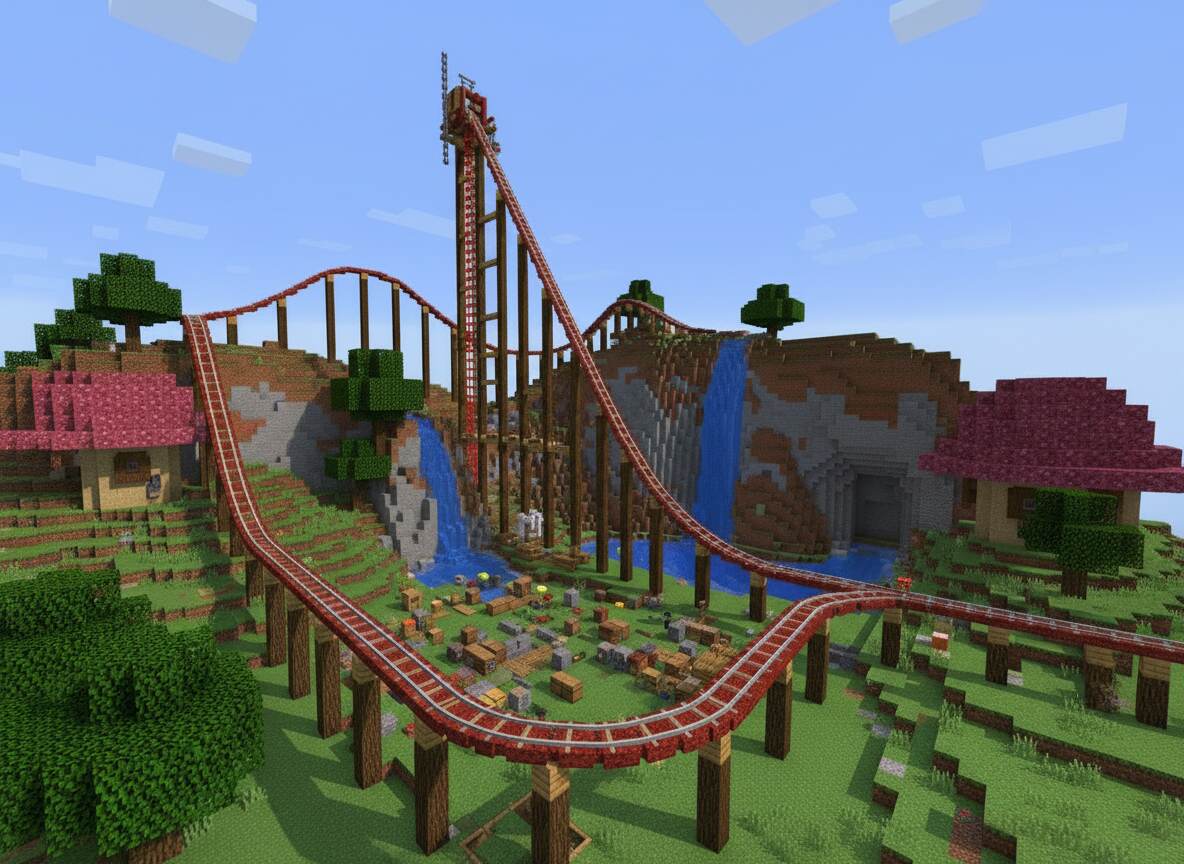
Use Terrain for Drama
Real parks love terrain coasters because they feel faster when they're close to the ground. In Minecraft, dropping into a canyon, cutting through a hill, or skimming water makes the ride feel way more intense than "drop in open air."
Step 5: Speed Control 101: Powered Rails, Gravity, and Why Your Coaster Stalls
This is where Minecraft coaster building becomes half art, half troubleshooting.
Why Coasters Stall in Minecraft
Usually it's one of these: not enough powered rails on climbs, too many flat sections without boosts, too many turns bleeding speed, or you built a hill after the speed is already gone.
Where to Put Boosts (So It Feels Natural)
Hide boosts where a real coaster would have momentum anyway: after a drop, exiting a turn, or in a "launch tunnel" section. If you slap powered rails randomly everywhere, the ride starts feeling like a subway line with caffeine.
Trim Brakes (Minecraft Version)
You can slow things down by using unpowered powered rails as brakes. That's a weird sentence, but it works. Powered rails that aren't powered act like a slowdown section, which is perfect for controlling runaway speed before a tight area.
Step 6: Turns, Curves, and the Art of Not Making People Nauseous
Minecraft rails don't bank. That means every turn is basically an unbanked flat turn, which in real coaster terms is... not ideal. But you can still make it feel good.
Use Larger Turn Radiuses
Tight turns at high speed feel jerky. Give your turns more space, especially right after big drops. If you want a sharp turn, slow the train slightly before it hits it.
Use "Turn Setup" Straights
A short straight before and after a turn makes the motion feel cleaner. It's the difference between a ride that feels intentional and one that feels like you were fighting the rails.
Step 7: Hills and Airtime (Minecraft Style)
Airtime in Minecraft isn't the same as real coasters, but you can still create that "floaty" feeling by using quick crests and repeated small hills.
Micro-Hills Are Your Friend
Instead of one giant hill, try a series of smaller hills after a speed section. It creates rhythm. Real coasters live and die on rhythm.
Don't Waste Speed on Pointless Elevation
If you climb high after you've already burned speed, you'll stall. Make sure big climbs happen when you've got momentum, or add a boost that feels like a lift/launch moment.
Step 8: "Special Elements" You Can Actually Do in Vanilla
You're not doing a B and M invert in vanilla rails, but you can still create signature moments that feel coaster-ish.
Tunnels and Near-Misses
Tunnels are instant intensity. Also, building track that passes close to supports, rocks, or themed structures creates that near-miss illusion that real coasters love.
Water Skims and Terrain Cuts
Run the track one block above water or slice through a hillside. It's cheap intensity, and it works every time.
Show Scenes
Dark rides and coasters overlap in Minecraft. Add a slow section through a themed room, then hit a boost out into daylight. That contrast makes the ride feel "designed."
Step 9: Supports and Structure: Make It Look Like It Could Stand Up
Coaster Me This rule: if it looks like it would collapse, it breaks immersion. Minecraft lets you float track, but your eyes know it's wrong.
Support Logic (Simple Version)
Supports under major turns, under high track, and at the base of drops. Add cross-bracing. Repeat patterns. Even if it's not structurally accurate, consistency sells it.
Material Choices
Wood supports for classic vibes, stone/metal for modern, and themed supports (nether brick, deepslate, quartz) for story coasters. Pick a palette and commit.
Step 10: Testing Like a Real Park: Iteration, Not Perfection
Real coasters get tested endlessly. Your Minecraft coaster should too.
Test Empty Track First
Ride it. Watch where it stalls, where it's too fast, where turns feel ugly. Fix the track before you decorate. Decorating too early is how you end up emotionally attached to a bad layout.
Test Different "Train Weights" (Player Behavior)
In multiplayer, people will spam carts, jump out, hit buttons randomly, and do chaotic stuff. If your station logic can't handle chaos, it'll break. Build with chaos in mind.
Step 11: The Best YouTube Tutorials to Learn Minecraft Coaster Building (With What They Teach Well)
You asked for embedded links to popular videos and some real talk about why they work. Here are solid, widely-searched coaster-building style videos that cover the basics and the "make it cool" side. Popularity changes over time, but these are the kinds of videos that consistently get watched because they solve real problems fast.
Video: "25 Minecraft Roller Coaster Ideas" (Idea-based design thinking)
This style of video is popular because it skips the slow "place rail, place rail" tutorial and goes straight to what people actually want: ride moments. Idea compilations work because they help builders break out of the same three shapes everyone makes (oval, rectangle, sad spiral).
What it teaches well: pacing variety, visual tricks, and how to add "signature moments" without needing mods. Even if you don't copy anything directly, you come away thinking in elements: drop, speed section, tunnel, near-miss, scenic turn, station finale.
How to use it: pick 3 to 5 ideas and build them into one cohesive layout instead of trying to cram all 25 into a single ride. That's how you avoid the "random nonsense coaster" problem.
Video: "Minecraft Tutorial: How to Make a Minecraft Roller Coaster" (Beginner rails - powered rails fundamentals)
Beginner tutorials stay popular because Minecraft coaster building has one main pain point: speed control. People can place rails, sure, but they can't make the ride run consistently. Videos like this typically focus on the basics that actually matter: powered rail placement, redstone torch powering, and how to avoid stalls.
What it teaches well: the "minimum viable coaster" that works, plus the logic of where boosts belong. It's the kind of tutorial you watch once, then you stop making coasters that die halfway through.
Why it's effective: it reduces the game's coaster system into a few repeatable rules. That's what beginners need, because Minecraft doesn't explain this stuff in a satisfying way in-game.
Video: "How to Build a Simple Minecraft Roller Coaster - Beginner" (Project-based learning)
Project-based tutorials are popular because they give you a complete loop: start, build, test, finish. You end up with a coaster that runs, not just a bunch of tips floating in your head.
What it teaches well: full build flow, especially the transition from station to lift hill to return run. It also tends to show how to keep the cart moving on flats without turning the whole ride into powered-rail spam.
Coaster designer takeaway: watch how they handle "dead zones," those sections where speed naturally dies. In real coaster design, that's where you'd avoid flat track or you'd design a momentum-friendly element. In Minecraft, it's where you hide boosts or re-shape the terrain.
Video: "Minecraft Tutorial: How To Make A Rollercoaster" (Theme park build context)
This kind of tutorial gets traction because it's not just track. It's "track inside a park." People don't only want a coaster, they want a coaster that belongs somewhere.
What it teaches well: integrating coaster track with a themed environment, building around pathways, and making the station feel like an attraction instead of a random rail start point.
Why it's popular: it scratches the theme park itch. A lot of Minecraft players are basically building their own Cedar Point or their own little local park, and this style of video supports that fantasy.
Video: "How To Build The Tallest Working Rollercoaster in Minecraft" (Spectacle builds and engineering constraints)
These "record-breaking" builds are popular for the same reason real record-breaking coasters are popular: spectacle. Even casual players will watch because it's a simple question with a dramatic payoff: will it work?
What it teaches well: extreme lift hill powering, long-run speed management, and the hidden truth that tall doesn't automatically mean good. You still need pacing and control, or it's just a long climb and a chaotic drop.
Coaster Me This angle: this is basically the Minecraft version of the height wars era. It's fun, it's impressive, and it's not always the best ride experience unless the builder knows what they're doing.
Video: "I Built Minecraft's Deadliest Roller Coaster" (Entertainment-first design and why it hooks viewers)
Challenge videos like this blow up because they mix coaster building with story. Even if the "deadly" part is exaggerated for YouTube, the format is effective: clear premise, escalating problems, and a final ride-through payoff.
What it teaches well (indirectly): how to make a coaster watchable. That matters if you're building for a server, a map, or a YouTube channel. The ride needs moments that read on camera: big drop, near-miss, tunnel, surprise turn, scenic reveal.
What to be careful about: entertainment builds sometimes ignore ride comfort and consistency. If you copy them exactly, you might get a coaster that's funny once but annoying to actually ride repeatedly.
Step 12: Building a "Realistic" Coaster in Minecraft (Using Real Coaster Principles)
If you want your coaster to feel like it belongs in a real park, steal from real coaster design. Not the exact shapes, but the logic.
Principle 1: The Ride Has a Purpose
Is it a family coaster? A terrain coaster? A mine train? A hyper coaster vibe? Decide, then build elements that match. A family coaster doesn't need a 200-block drop. A hyper coaster shouldn't crawl through a tiny indoor hallway for 40 seconds unless it's themed that way.
Principle 2: Pacing Over Raw Stats
A coaster with a 50-block drop and smart pacing feels better than a 150-block drop that's boring. Real parks know this. Your Minecraft coaster should too. Think about the emotional journey, not just the height.
Principle 3: Terrain Interaction
Real coasters that interact with terrain feel faster and more intense. In Minecraft, this means building your coaster into the landscape instead of floating it in the sky. Dig a canyon, build on a mountainside, or cut through a forest. Proximity to ground = perceived speed.
Principle 4: Sightlines and Reveals
Real coasters are designed so riders see key elements at the right moment. Build your coaster so the big drop isn't visible from the station (builds anticipation), the best turn is visible from the queue (sells the ride), and the finale is dramatic (leaves a good last impression).
Principle 5: Restraint Design (Minecraft Version)
In real coasters, minimal restraints make you feel more scared. In Minecraft, you can't change restraints, but you can design the ride to feel more or less intense. Open track over water feels scarier than enclosed track. High drops feel scarier than speed on flat ground.
Step 13: Common Minecraft Coaster Mistakes (And How to Avoid Them)
You don't have to make every mistake yourself. Here are the ones everyone makes.
Mistake 1: The "Powered Rail Everywhere" Coaster
Beginners think more powered rails = better coaster. Wrong. It makes the ride feel jerky and unnatural. Use powered rails strategically: lift hills, launch sections, and speed recovery. Let gravity do the work on drops and turns.
Mistake 2: The "No Scenery, Just Track" Coaster
A coaster floating in empty space feels lonely and unfinished. Even basic theming (supports, terrain, a few themed blocks) makes a huge difference. You don't need a full theme park, just context.
Mistake 3: The "One Long Straight" Coaster
Straight track is boring. Real coasters are constantly turning, climbing, or dropping. Minecraft coasters should too. If you have a long straight, add a tunnel, a near-miss, or a speed change to keep it interesting.
Mistake 4: The "Stall Halfway Through" Coaster
This happens when you don't plan speed management. Test your coaster empty first. If it stalls, add powered rails or flatten the terrain. Don't decorate and hope it works.
Mistake 5: The "Turns Are Uncontrollably Fast" Coaster
If your coaster is flying through turns and feeling chaotic, slow it down before the turn or make the turn radius bigger. Speed management is half of coaster design.
Step 14: Advanced Tricks (Once You've Built a Few)
Once you've got the basics down, here's how to level up.
Slime Block Launches
Slime blocks can launch minecarts if you use pistons and timing right. It's finicky, but it creates a launch moment that powered rails alone can't match.
Detector Rail Logic
Detector rails trigger redstone when a cart passes. You can use them to automate station dispatches, trigger sound effects, or control ride sections. It makes the coaster feel more like a real attraction.
Multi-Cart Trains
Instead of one minecart, link multiple carts with leads or build a train-like experience. It changes the feel and allows multiple riders.
Theming Layers
Add lighting, custom trees, water features, and themed blocks in layers. A coaster with depth and visual interest beats a coaster with just track.
Custom Maps and Datapacks
If you're comfortable with datapacks, you can create custom track textures, smoother animations, and more realistic coaster behavior. It's advanced, but it's the closest you can get to a real coaster simulator in vanilla Minecraft.
Step 15: Building for Multiplayer and Servers
If you're building a coaster for other players, think differently.
Station Design for Chaos
Players will spam buttons, jump out mid-ride, and break things. Build your station to handle this. Use detector rails and repeaters to prevent double-dispatch. Add guardrails so people don't fall off.
Ride Duration
A coaster that takes 30 seconds is better for multiplayer than one that takes 3 minutes. People want to ride multiple times, and they don't want to wait forever.
Difficulty Scaling
Build a coaster that works for casual players and hardcore players. Maybe a "normal" route and a "hard" route with extra speed and intensity.
Clear Signage
Use signs to explain how to use the coaster. "Press button to dispatch," "Don't jump off," "Sit down." It prevents confusion and accidents.
Step 16: Why Minecraft Coasters Matter (Beyond Just Fun)
Building coasters in Minecraft teaches real skills that coaster enthusiasts and designers actually use.
Spatial Reasoning
You're thinking in 3D, planning elevation changes, and visualizing how elements connect. That's the same skill real coaster designers use.
Problem-Solving
When your coaster stalls, you debug. When a turn feels wrong, you iterate. That's engineering thinking.
Aesthetics and Design
You're learning that function and form matter equally. A fast coaster that looks ugly feels worse than a slightly slower coaster that looks amazing.
Systems Thinking
A coaster is a system: lift hill, drop, turns, speed management, station logic. Understanding how each part affects the whole is how real designers think.
Step 17: From Minecraft to Real Coaster Appreciation
Once you've built a few Minecraft coasters, you'll appreciate real coasters differently. You'll notice the lift hill design, the pacing, the terrain interaction, and the engineering. You'll understand why some coasters feel better than others.
You might even find yourself thinking "I could design that better" or "that turn is genius." That's the coaster nerd awakening, and Minecraft is basically the training ground.
Real coaster designers started somewhere. Some of them probably built coasters in games before they built them in real life. Minecraft is a legitimate design tool, even if it's also just a game.
Conclusion: Your Minecraft Coaster Journey Starts Now
Building a roller coaster in Minecraft is more than just placing blocks and rails. It's about understanding pacing, speed management, terrain interaction, and the psychology of a good ride experience. It's about iteration, testing, and refining until something that started as a random idea becomes a real attraction.
Start simple. Build a basic coaster that runs without stalling. Then add theming. Then experiment with speed and pacing. Watch YouTube tutorials, steal ideas from real parks, and learn from your mistakes.
The coasters you build in Minecraft won't have real G-forces or real screams, but they'll teach you how to think like a designer. And that's something you can carry with you whether you're building in Minecraft, visiting real parks, or just appreciating the engineering behind the attractions you ride.
The next time you ride a real coaster, you'll understand the work that went into it. You'll see the lift hill design, the pacing strategy, the terrain interaction, and the engineering excellence. And you'll appreciate it on a whole new level.
That's the real payoff of building coasters in Minecraft. It's not just about the game. It's about understanding the art and science of coaster design.